How to connect cameras to the Ajax security system?
Video surveillance has long been a top feature request from Ajax security system users. And there’s a reason Ajax asks users for feedback! Now the Ajax Security System app for iOS and Android can broadcast RTSP streams from security cameras. The video surveillance in addition to protection against break-ins, fire and flooding, as well as automation.
Why do you need a camera?
• To know exactly who has entered your home (especially in case of a break-in).
• To keep an eye on the cleaners while you’re away.
• To watch your kids, even when you’re halfway across the globe.
• To monitor whether your employees are at their desks at 9:00 sharp.
You can connect any IP camera that uses the RTSP protocol to the Ajax security system. There are no restrictions on brands or models, and the application supports up to 10 cameras or streams.
Ajax Systems didn’t choose RTSP by accident — the protocol is supported by hundreds of cameras. It gives users the maximum possible freedom of choice when it comes to video surveillance equipment. Although this means that connecting a third-party camera is somewhat more complicated than connecting Ajax devices (when you just need to scan a QR-code to connect Ajax products). Ajax is currently working to integrate popular cameras into the security system. And then you’ll be able to store video on a server and view it online. But in the meantime, you’ll need a third-party DVR to record video streams.
How to connect an IP camera to the Ajax
If your ISP provides a static IP address:
Connect the camera to the router and configure it using the camera’s manual. Assign a free static IP address to the camera on the internal network. Check which port is being used for the camera’s RTSP stream (the default is 554) and set up port forwarding on the router. If several cameras are connected to the router, set up port forwarding for each camera.
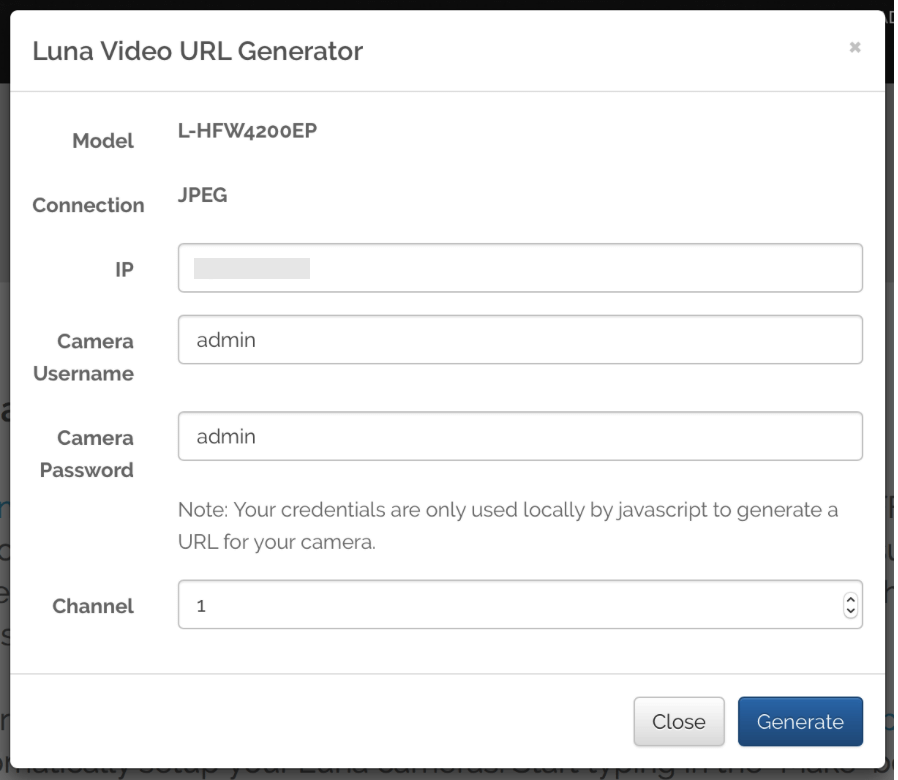
Generate an RTSP URL (for each camera), which will allow Ajax to receive the video stream. To do this, either refer to your camera’s manual or use the RTSP URL generator:
Select the camera manufacturer from the list:

Choose the model of your camera:

Specify the static IP address provided by the ISP (WAN IP router). If necessary, change the username and password, as well as the stream number:

Each stream is added to the Ajax Security System application as a separate camera. To select the optimal stream (for example, video with sound or in HD resolution), refer to the camera’s manual.
Click the “Generate” button and copy the RTSP URL of your camera:

Add the port number to the generated URL:
Example of the generated URL:
http://admin:admin@192.168.1.20/cgi-bin/snapshot.cgi?loginuse=admin&loginpas=admin
Generated URL with the port number:
http://admin:admin@192.168.1.20:554/cgi-bin/snapshot.cgi?loginuse=admin&loginpas=admin
You should add the number of the forwarded port of the camera to the URL!
If your ISP does not provide a static IP address, use the DynDNS service.
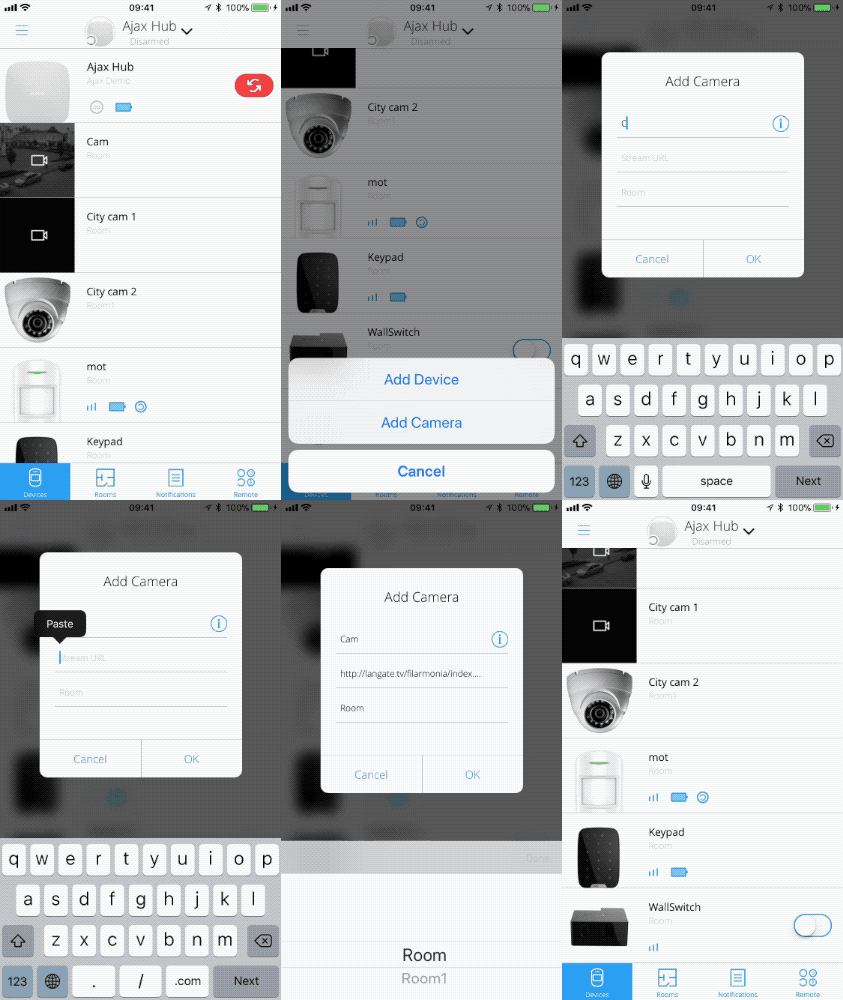
Using the Ajax Security System app, go to the menu to add new devices (cameras). This is where you’ll be able to specify the name, the RTSP URL and the room:

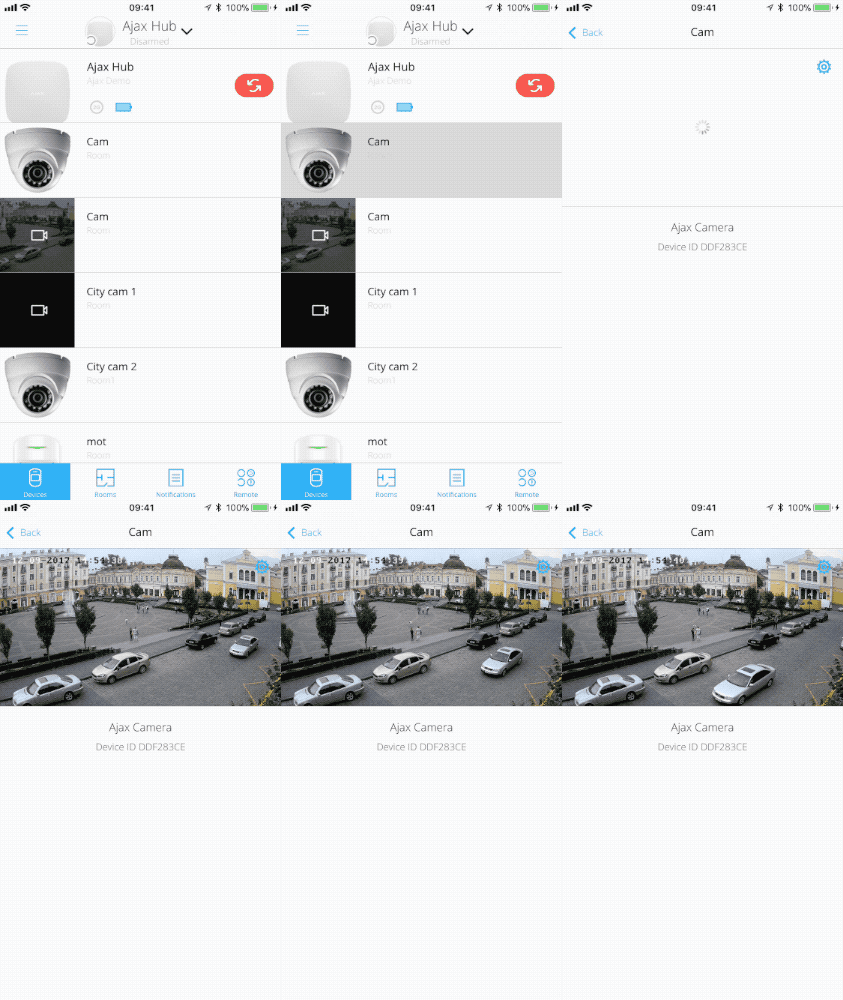
In order to view the video stream, just open the camera in the Ajax Security System application:
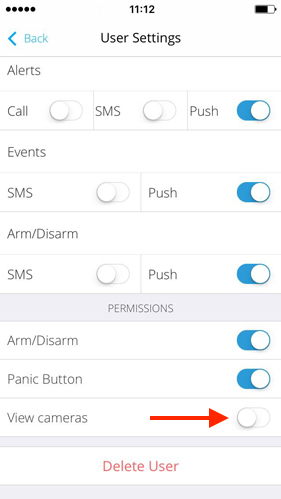
To provide access to the cameras to users of the security system, activate “View cameras” setting through the hub menu:
Ajax knows that it can be difficult to set up a camera and a router, then find a usable RTSP link. These tasks aren’t exactly trivial, especially for a user who isn’t confident in their technical abilities. So unexpected difficulties or nuances may come up. If you have trouble connecting a camera to Ajax while following these instructions, Ajax strongly recommend contacting the manufacturer of the router or camera (depending on what you’re having issues with), asking for help from a tech savvy friend or finding a specialist.
